Liquid Evolution Pools invited Brian Fitzgerald of Oceanside Glass and Tile to spectacular jobsite in Paradise Valley, AZ for the installation of Oceanside’s bronze iridescent glass pool tile. Brian is going to walk us through the right way to install the beautiful tile the homeowner has chosen for their pool.

This video covers all of the important steps in the system for a proper glass pool tile installation, from the concrete tank outward to the waterproofing, bonded mortar bed, to your thin-set grout and sealants.
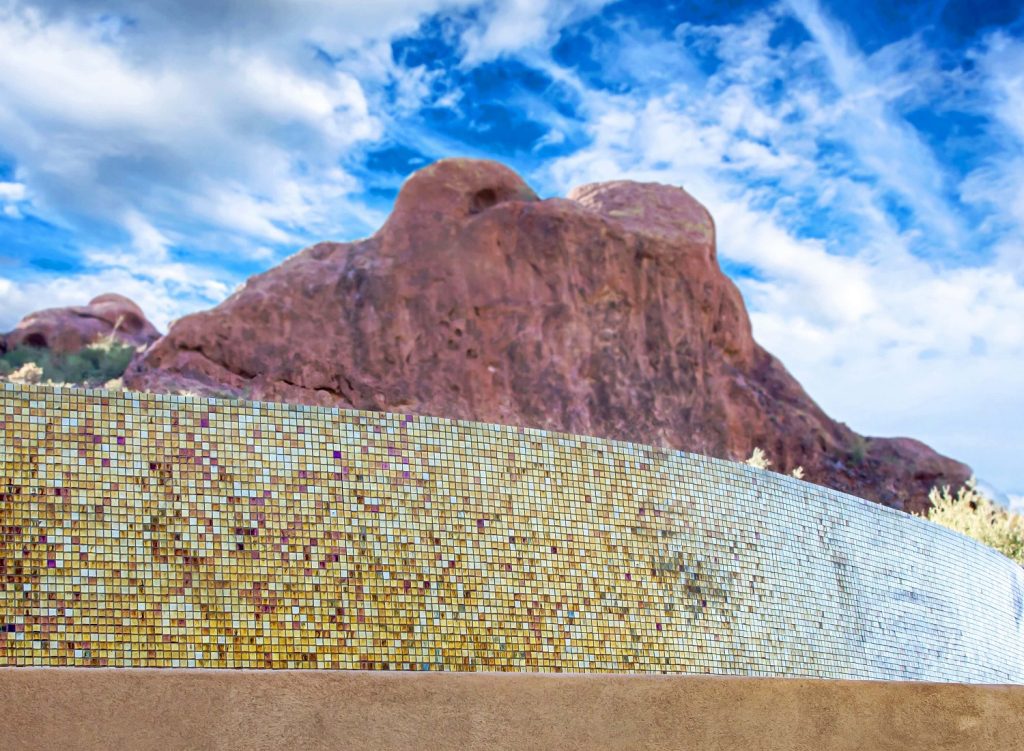
This pool is in Arizona where it gets hot during the day and cold at night. So we’re going to be installing movement joints about every eight feet on this negative edge pool. Additionally, we’re going to be using bond breaker tape and Latasil 100% silicone sealant over the top of that to get a properly detailed high-performance installation, and this glass tile wall is going to last a very long time.

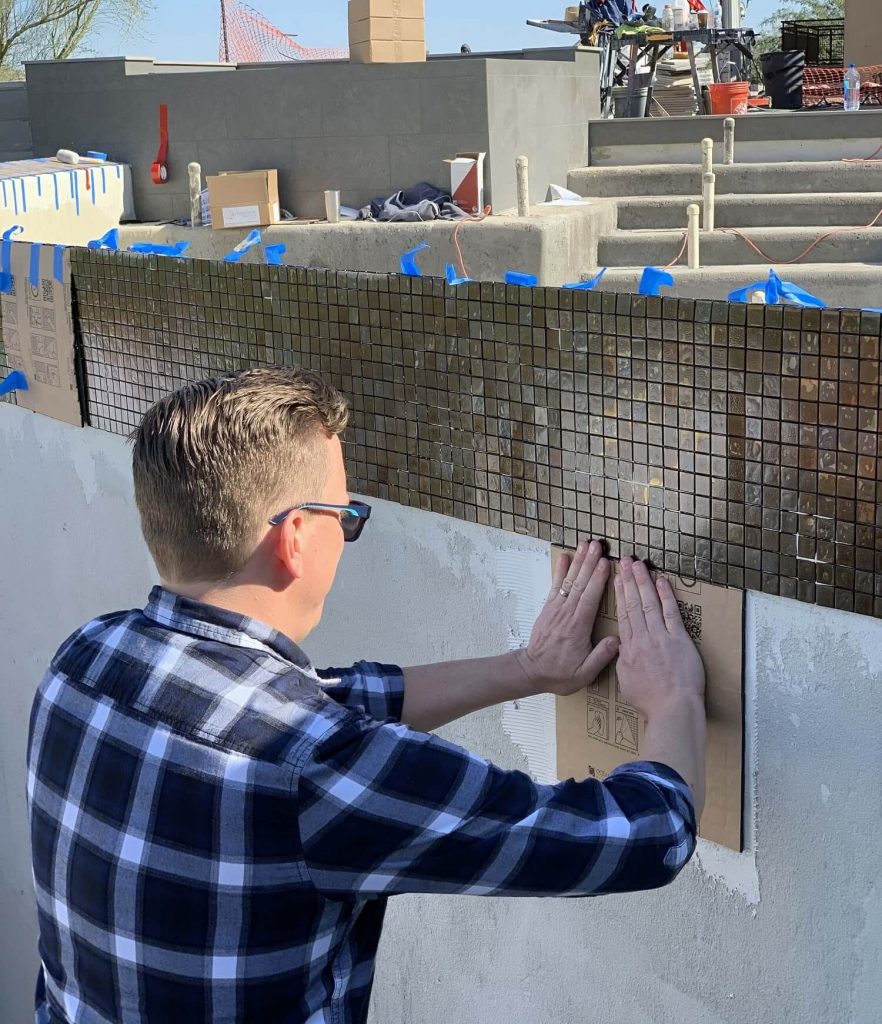
This negative edge pool will be getting ⅞ x ⅞ bronze iridescent glass tile. This glass pool tile paper face-mounted, which means it’s mounted into a sheet with a water-soluble glue on the front of the tile. Brian shows us the nuances of how to properly adhere to this tile to the wall with a multistep process for the mortar. This process creates a smooth surface for the tile to be pressed into. The next step is to then use a wooden block and hammer to tap the tile to make sure it is well bedded into the mortar.
Once the tile has had a chance to set for a bit it is time to remove the paper. This process requires wetting the paper with a damp sponge for several minutes. After about seven minutes the glue will start to release and the beautiful tile is exposed. Now is the time to make any little adjustments to the tile.
After a good day or so of setting up, a nylon scrub brush and water is used to get off any of the residual glue from the tiles and after a rinse and towel dry the tiles are ready for grout. Once the grout is installed you’re done, right? In many cases, yes, but if you want to be proactive and protect the pool there are more steps. Sealing the grout is highly recommended to prolong both its life and its color. There are other products such as a glass and tile shield as well as a calcium releaser, especially for iridescent glass tile.
Visit https://liquidevolutionpools.com to see more examples of luxury pools built with Oceanside Glass and Tile by Liquid Evolution Pools. Watch for the full reveal of pool in the Spring.
Video Transcription – Installing Glass Pool Tile on a Negative Edge Pool in Paradise Valley, AZ
Hey everyone, this is Brian Fitzgerald with Oceanside Glass and Tile. Today I am on a spectacular job site with Liquid Evolution Pools. Well, we’re going to show you how to install our new seven eighths by seven-eighths bronze iridescent tile the right way.
So an often overlooked part of working on an outdoor living project, particularly luxury pools, is site protection. It’s the environment. We happen to be working today in Arizona in November and it is absolutely beautiful out here. Its perfect weather for working, where the guys are installing tile is mainly shaded. So we don’t have to worry about it today, but if you’re in an area that freezes, gets a lot of rain, those types of things. Thinking about how you’re going to protect the pool tile both during the pool construction and installation. The curing phase is going to be an important part of your installation.
In every step of this process, the various materials we’re utilizing are going to have cure times that the manufacturer specifies before you go on to the next step. And it is super critical that you adhere to those cure times. So the layers of waterproofing, get to your thin-set in your grout, and then at that stage, your cure times can range anywhere from generally 14, up to 28 days before you’re going to fill the swimming pool with water. And if you do that too soon, you’re going to seriously degrade those materials and you can have some real problems.
Movement joints can be a controversial topic and advice on the subject will range dramatically depending on who you talk to. But here’s the deal, glass expands and contracts more than ceramic or porcelain. And giving it somewhere to go with a movement joint is absolutely critical, particularly above the waterline where you have environmental conditions that range widely. We’re here in Arizona, it gets hot during the day, it gets cold at night. So on this negative edge, we’re going to be installing movement joints about every eight feet. We’re going to be using bond breaker tape and Latasil 100% silicone sealant over the top of that to get a properly detailed high-performance installation, and this Weir Wall is going to last a very long time.
Well, everything we’re going to cover in this video is important. Ultimately what the performance of your tile installation their pool comes down to is going to be the installation system. And what do I mean by the system? I mean all the materials you utilize from the concrete tank outward. This includes a primary waterproofing that goes on the tank, a bonded mortar bed, a secondary waterproofing that goes over the mortar bed, and then your installation materials, your thin-set grout and sealants that you use with the tile installation.
So at Oceanside Glass and Tile, we provide full swimming pool tile installation instructions. These are available on our website at glasstile.com and this includes a full list of materials that we recommend for each layer within that system. On this particular project, Liquid Evolution Pools is utilizing some Basecrete product waterproofing for their primary and secondary waterproofing and all a lot of Creed installation materials, but it’s all from the list within our instructions.
So for example, the primary waterproofing that goes on the concrete tank, it prevents both negative and positive hydrostatic pressure. That’s just fancy words for water moving back and forth through the concrete, which can create a lot of problems. It can cause problems with the pool tile de-bonding and blowing off the face of a negative edge wall like this. It can cause problems with efflorescence, which is the white stuff that comes pouring out of the grout joints, which a lot of people see. Each one of these materials in the full system provides critical protection and performance in the installation, so it’s super important that you utilize the right products. Go check out the instructions and see the list.
The tile we’re using here today is Oceanside Glass and Tile’s muse seven eighths by seven-eighths bronze iridescent tile. Now, this product is paper face-mounted, which means it’s mounted into a sheet-like this using paper with a water-soluble glue on the front of the tile.
So when you look at it out of the box, this is actually the back of the tile. Now this is preferable in a submerged application because you’re not dealing with mesh and glue that can be a questionable quality and can break down in a water environment. So you’re getting 100% bond to the back of the tile, which is awesome. The nuance to it though is that it’s mounted from the front with this paper, which not all installers are familiar with, but it’s a very basic, easy process to install it and there are some pretty simple steps to it. So the first thing you’re going to do is take your three-sixteenths by quarter-inch V notch trowel, and you’re going to use the flat side of that trowel to apply a little bit of mortar to the wall and you’re going to really key it into the substrate. Press it in, smooth it out, just a really tight coat to just start your application process.
Then next you’re going to use the notched side of the trial and you’re going to pull nice full notches in one direction. And it’s key here to keep contact with the substrate. Keep a nice consistent angle on the trowel and pull through in one direction. Nice clean, full notches. Next, you’re going to clean off your flat side of the trowel and you’re just going to lightly roll those notches over to get a nice smooth, even, consistent mortar bed. Now, this is really important if you’re working with a translucent tile, we happen to be working with a pool tile today that you can’t see through, but some of our products you can. If you don’t flatten those notches and do that step, you’re going to end up seeing those trowel March through the tile. It can be incredibly unsightly. It can actually be a place where you can get mold and mildew growth as well down the road.
Once you have a nice, smooth bed of mortar that tile sheet is going to get placed into the mortar paper side out. Once it’s in place and just lightly pressed in, you’re going to use a beating block and a hammer to tap it in. Supercritical to get a flat installation, work from sheet to sheet, across the tile, make sure it’s really well bedded into the tile. After that’s been in place for about 10 to 15 minutes, depending on the weather and the mortar you’re using, you’re going to start wetting the paper with a damp sponge. After about seven minutes of keeping that paper wet, the glue is going to release and you’re going to be able to pull that paper off the face of the tile and expose the tile for the first time.
Now at this point, if you’ve done it correctly, the mortar should still be flexible enough that you can make adjustments and that’s really what separates a decent installation from a great installation is making those fine adjustments, particularly paying attention to the sheet lines, making adjustments between sheets and unifying the overall mosaic pattern.
So once you’ve made all your adjustments so you get a nice uniform installation, you’re going to want to set that up generally 24 hours at which point you can come back and clean off the residual glue from the mounting paper, just using a little of water and a nylon scrub brush. It’s a water-based glue. It comes off really easily. Give it a little scrubbing, clean, rinse, towel dry and you’re ready to put in the grout. Once you’ve got your grout installed, your movement joints detailed, everything cleaned up. Most installers would think they’re done.
And in a lot of cases, they’re right, but if you wanted to be proactive and really protect your installation, you can go the next step. Set yourself apart. First, I’d highly recommend you seal the grout with Ocean Care Products, High-performance Penetrating Sealer. With a cement-based grout, sealing the grout is really going to help prolong the life of the grout, keep that color locked in and prevent staining.
Next, I’d highly recommend applying Ocean Care Products Glass and Tile Shield. Now that’s a surface protectant that’s going to keep calcium from sticking to the tile and keep the tile cleaner longer. And then lastly, I’d highly recommend getting your customers some Ocean Care Products. Calcium Releaser, which is a non-acidic cleaner, which is supercritical when dealing with an iridescent glass pool tile like this.
Iridizing is a really thin layer of metal that’s fused into the glass. And those metals can be susceptible to damage from acids, particularly strong acids like muriatic or hydrofluoric. So Ocean Care Products Calcium Releaser is not acidic, highly effective, and safe for glass tile. Not to mention it’s non-toxic and environmentally friendly. So go check it out.
Resources & Mentions from the Video
- Oceanside Glass & Tile Website – https://www.glasstile.com/
- Oceanside Glass & Tile 7/8″ x 7/8″ Bronze Iridescent – https://www.glasstile.com/product/mus…
- Oceanside Glass & Tile Cleaning Products – https://dev-glasstile.pantheonsite.io…
We hope you enjoyed this video. If you want to stay up to date on our projects and more videos like these please subscribe on YouTube.